Color Psychology in Interior Design: The Complete Guide for Beginners
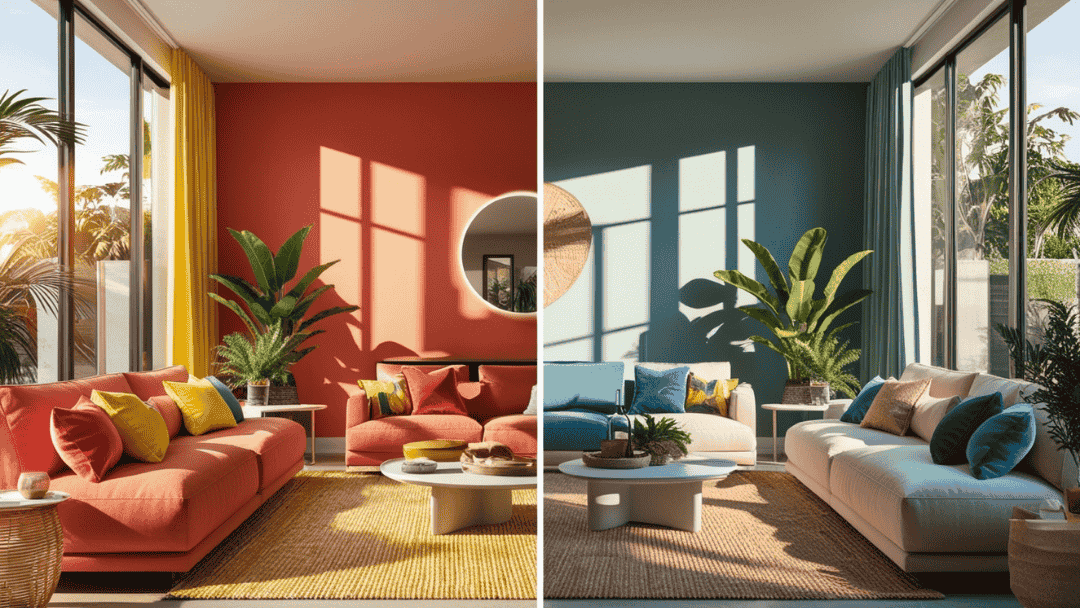
Did you know that 85% of people say color influences their purchasing decisions? Even more fascinating is that it takes just 90 seconds for someone to form a subconscious judgment about their environment – and up to 90% of that assessment is based on color alone! I’ve spent years redesigning spaces, and I can tell you firsthand that understanding color psychology is like having a secret weapon in interior design.
I’m thrilled to share everything I’ve learned about color psychology in interior design. When I first started in this field, I made plenty of mistakes. But through years of experience and plenty of trial and error, I’ve discovered how to harness the power of color to create spaces that don’t just look good – they feel amazing too!
Understanding color psychology interior design is foundational for creating impactful spaces. The way colors affect your home’s mood can transform any room’s atmosphere. By mastering the interior design color wheel principles, you’ll learn to balance warm vs cool colors in interior effectively. Whether you’re seeking colors to make a room look bigger or creating perfect color flow between spaces, strategic color selection is key.
What is Color Psychology in Interior Design?
Let me tell you something interesting – color psychology isn’t just some new-age concept! The ancient Egyptians actually studied the effects of colors on mood and used them for holistic healing. Pretty cool, right? In interior design, color psychology is all about understanding how different colors affect our emotions and behavior.
I remember working with a friend who was struggling with insomnia. She had painted her bedroom bright pink because it was her favorite color – no wonder she couldn’t sleep! After we switched to a calming blue-gray, she started sleeping like a baby. It’s amazing how something as simple as paint color can have such a huge impact on our daily lives.
The science behind this is fascinating. Research has shown that colors can affect everything from our heart rate to our appetite. Ever wondered why many fast-food restaurants use red and yellow in their designs? These colors have been proven to stimulate appetite and create a sense of urgency!
In my experience, the most successful interior designs are those that deliberately use color psychology to create the desired emotional response. Whether it’s a calming home office or an energetic workout room, the right colors can make all the difference.
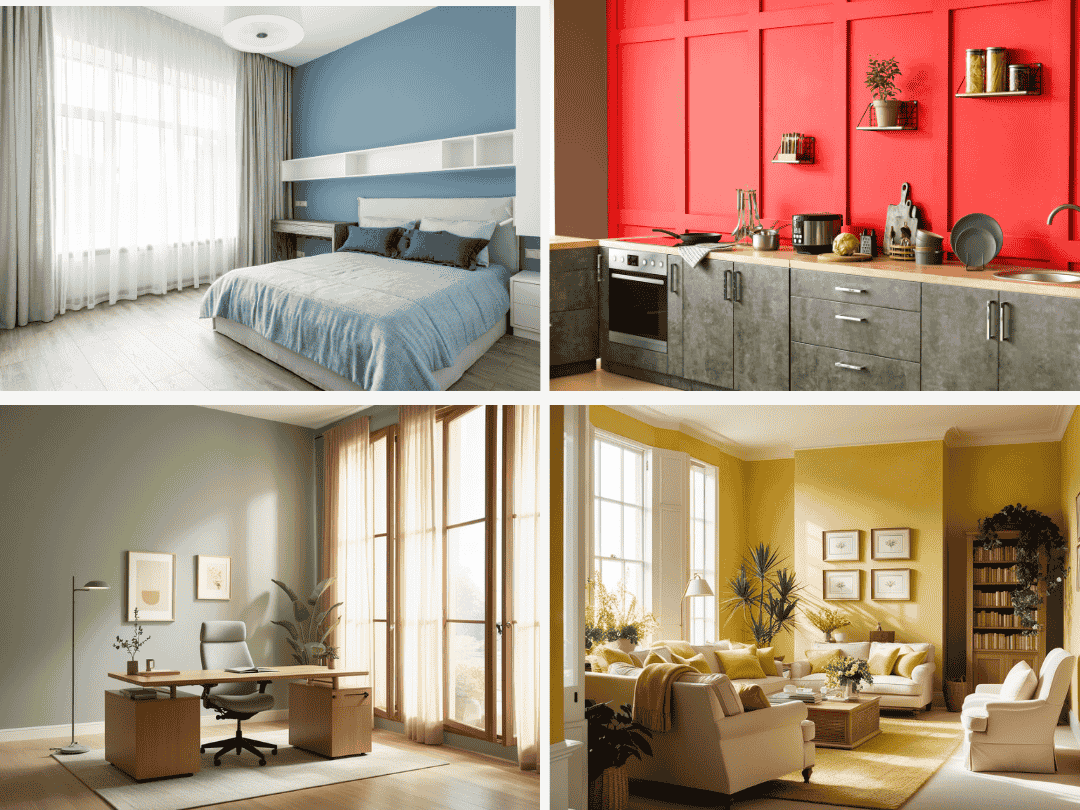
The Emotional Impact of Basic Colors
Let’s dive into how different colors affect us emotionally. I’ve seen these effects firsthand in countless homes, and trust me, they’re real!
🔴 Red: Energy and Passion
Red is like that friend who’s always the life of the party! It increases heart rate and energy levels – great for dining rooms or social spaces, but maybe not so much for bedrooms (unless you want to only focus on passion, not sleep ;-)). I once designed a red accent wall for a client’s home gym, and she said it totally transformed her workout motivation.
🔵 Blue: Calm and Serenity
Blue is my go-to color for creating peaceful vibes. It’s like a big, calming hug for your space! I’ve used it countless times in bedrooms and bathrooms. Fun fact: people are actually more productive in blue rooms – something about the color helps us focus and feel more confident.
🟡 Yellow: Happiness and Creativity
Yellow is sunshine in color form! But here’s a tip I learned through experience – a little goes a long way. I once painted an entire home office yellow, and it just didn’t feel right. Now I use it as an accent color, and it works like a charm for boosting creativity without overwhelming the space.
🟢 Green: Balance and Harmony
Green is like nature’s neutral, I always say! It’s incredible how versatile this color is. I recently designed my own home office with sage green walls, and even though I was a bit concerned in the beginning, that it would make the small space feel even more dark than before, I realized that my stress levels dropped noticeably. There’s actually science behind this – our eyes don’t need to adjust to see green, which makes it super restful. I love using it in spaces where people need to feel balanced and calm.
🟣 Purple: Luxury and Creativity
Purple is the color of royalty, and boy, does it act like it! I’ve learned to use this one carefully. A deep eggplant in a meditation room can create an amazing sense of luxury, but too much bright purple can be overwhelming. Also I must admit that I personally don’t like purple. It’s just not my cup of tee so I prefer to stay away from it
🟠 Orange: Sociability and Fun
Okay, confession time – orange and I have a complicated relationship too! Orange walls somehow always remind me of that holiday resort we went to when I was a child and therefore rooms with lots of orange feel outdated to me. But that’s again – just a personal taste. When used moderately as an accent color, it can be of great use. It’s fantastic for social spaces like game rooms or exercise areas. I recently used coral orange accents in a dining room, and now my clients say their dinner parties are more lively than ever. Who knew a color could be such a conversation starter?
🟤 Brown: Stability and Comfort
Brown is like that reliable friend who’s always there for you. It gets a bad rap sometimes, but trust me – in the right shade and context, it’s amazing! I love using rich chocolate browns in libraries or studies. The trick is mixing it with other colors to prevent it from feeling heavy. My favorite combination? Brown with sky blue – it’s like earth and air coming together, giving you a comfort hug!
⚪️ White: Cleanliness and Space
White isn’t just a blank canvas – it’s a powerhouse in its own right! But here’s something I learned the hard way: not all whites are created equal. I once used a stark white in a north-facing room and it felt like a freezer! Now I always consider the undertones. Warm whites can make a space feel cozy while cool whites create that modern, crisp feel. Pro tip: I always recommend having at least three white samples before making a final decision.
⚫️ Black: Sophistication and Drama
Black is like the little black dress of interior design – powerful but needs the right accessories! I was terrified of using black when I first started designing, but now I absolutely love it for creating drama. The key is using it intentionally. One of my favorite projects involved a black accent wall in a home office – it made the whole room feel like a high-end executive suite! Just remember, like espresso, a little goes a long way.
Here’s a cool tip I’ve picked up over the years – it’s not just about using these colors individually. The magic often happens when you combine them thoughtfully. I recently worked on a living room that combined deep blue walls with white trim and brass accents – the homeowner literally gasped when she saw it finished!
You might be wondering about gray – it’s technically not on our basic color list, but it deserves a mention! Gray is like the Switzerland of colors – neutral but far from boring. I’ve found it’s perfect for creating sophisticated backgrounds that let other colors shine. Just be careful with those undertones – I once chose a gray that looked perfect on the swatch but turned into a chameleon on the walls, showing different undertones throughout the day!
One thing I’ve learned about all these colors is that context is everything. The same color can feel totally different depending on:
- The quality of light in the room
- The colors it’s paired with
- The size of the space
- The finish you choose (matte, eggshell, glossy)
- The texture of the surfaces
For example, I once used the exact same yellow in two different rooms – in the sunny kitchen, it felt cheerful and energizing, but in the north-facing study, it felt a bit sickly. That taught me a valuable lesson about always testing colors in the specific space where they’ll live!
Remember, while these color associations are pretty universal, personal experiences and cultural backgrounds can influence how we perceive colors. I always encourage my clients to trust their instincts – if a color doesn’t feel right to you, it probably isn’t, regardless of what the psychology says!
Want to experiment with these colors but feeling nervous? Here’s my favorite low-risk approach: start with accessories! Throw pillows, artwork, and decorative objects are perfect for testing how a color makes you feel in your space. You can always switch them out if they’re not working, which is a lot easier than repainting an entire room (ask me how I know! 😅).
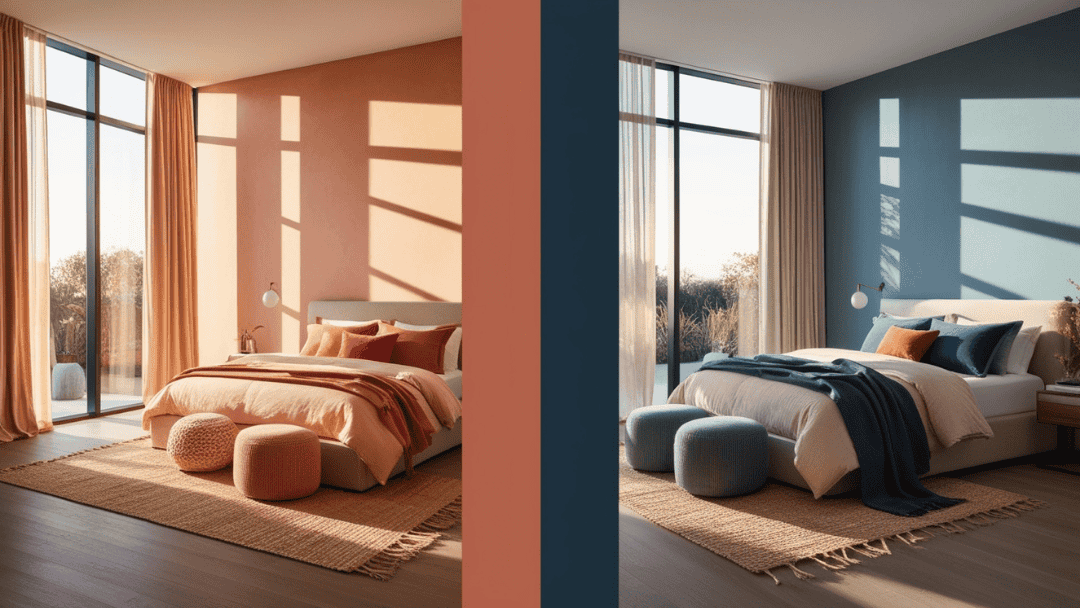
How Colors Affect Different Rooms
This is where the rubber meets the road, folks! Each room in your home serves a different purpose, so it needs different colors to support that purpose.
Living Room Color Strategies
Your living room is like the heart of your home – it needs to be welcoming but not overwhelming. I usually recommend starting with a neutral base (I learned this after my “bold wallpaper everywhere” phase!) and then adding color through accessories. One of my favorite tricks is using a 60-30-10 color rule: 60% dominant color, 30% secondary color, and 10% accent color.
Bedroom Color Strategies
Let’s talk about creating your perfect sleep sanctuary! After years of experimenting, I’ve found that bedrooms are super sensitive to color psychology. I learned this the hard way when I painted my own bedroom bright turquoise – sure, it looked amazing on Pinterest, but try falling asleep with that much energy on the walls!
For bedrooms, I usually recommend colors that naturally occur at sunset – soft blues, gentle peaches, and warm grays. These colors actually help your brain prepare for sleep! Before I start repainting, I like to experiment with comforters and pillows to see how the room feels with my color of choice.
Pro tip: Save those energizing colors like bright yellow or orange for your bedroom accessories. That way, you get the morning boost when you need it, but it won’t keep you up at night!
Kitchen Color Psychology
The kitchen is like the heart of your home, and color plays a huge role in appetite and social interaction. Like mentioned earlier – restaurants actually use red and yellow because these colors can increase appetite! But in home kitchens, we usually want something a bit more balanced.
I love using these colors in kitchens:
- Warm whites (they make the space feel clean but not clinical)
- Soft greens (great for promoting healthy eating habits)
- Rich blues (they actually suppress appetite – perfect if you’re watching your late-night snacking!)
One of my favorite kitchen transformations involved painting a dark, dreary kitchen in a warm butter yellow. The client said her family started spending more time there just because it felt so welcoming!
Home Office Color Impact
This one’s become super important lately, hasn’t it? With more people working from home, your home office color can make or break your productivity. I once had a client who couldn’t focus in her home office – turns out the bright red walls were basically screaming “emergency!” at her brain all day.
The best home office colors in my experience:
- Sage green for creativity and focus
- Light blue for productivity (increases focus by up to 15%!)
- Soft gray for professionalism (perfect for those video calls)
Avoid pure white – it can cause eye strain when you’re staring at screens all day. I learned that one after spending a week working in my all-white guest room during a home renovation!
Bathroom Color Selection
Bathrooms are like your personal spa opportunity! I always tell my clients to think about how they want to feel in this space. Morning person? You might want energizing yellows or corals. Night owl who loves relaxing baths? Think about soft blues or lavenders.
My favorite bathroom project was for my family home guest bathroom that hadn’t been remodeled in 50 years. I wanted their bathroom to feel like a high-end spa. I used a combination of soft beige and white, and added warm wood accents with a DIY countertop. While the bathroom itself is neutral, by adding decor elements like bathmaths, towels, pictures and other small items, you can totally change the vibe within minutes. Currently we added a soft pink color touch, but who knows – maybe next year we use a pastel blue or sage green. Staying neutral in the base is a great way to have something for the long run, that won’t feel outdated within a couple of years. Because trust me, bathroom renovations are not cheap.
Remember: When choosing bathroom colors, always test your samples in both natural and artificial light. I once chose a gorgeous gray for a bathroom, only to find it looked slightly green under the client’s LED lights!
Children’s Room Considerations
Kids’ rooms are where you can have the most fun with color, but there’s still some psychology to consider! I’ve noticed that super bright colors can actually make it harder for kids to settle down for naps or bedtime.
Here’s my tried-and-true approach:
- Use calmer colors on the walls (soft yellows, gentle blues, warm greens)
- Add brighter colors through accessories and artwork
- Consider how the color will grow with your child
- Include their favorite color in small doses
One of my favorite projects was a room for a little girl who insisted on hot pink everything. Instead of fighting it, we used a soft gray on the walls and added pink through curtains, bedding, and accessories. When she eventually outgrew pink (two years later!), it was much easier to update the room.
Living Room Flow
Remember how I mentioned color flow earlier? The living room is where this becomes super important because it often connects to other spaces. I think of the living room as the color anchor for your home.
For living rooms, consider:
- The natural light throughout the day
- How the space connects to other rooms
- What activities happen there
- The size of the room
I recently worked on a living room that felt like a cave until we lightened up the walls to a warm greige (that’s gray-beige in designer speak!). The color completely transformed the space, making it feel bigger and more welcoming. Plus, it created a perfect neutral backdrop for my client’s colorful art collection.
Here’s a secret tip: If you’re stuck on choosing a living room color, look at the undertones in your largest piece of furniture. I once helped a client pick the perfect wall color by matching the undertones in their gorgeous brown leather sofa – it created this amazing cohesive look that seemed to just “happen” naturally!
Remember, these are guidelines, not rules carved in stone. I’ve seen some amazing spaces that break all the “rules” but work perfectly because they reflect the personality of the people living there. The most important thing is that YOU feel good in your space!
Unlock Designer-Perfect Colors in Minutes
Browse my curated collection of interior color palettes—tailored for today’s most loved design styles.
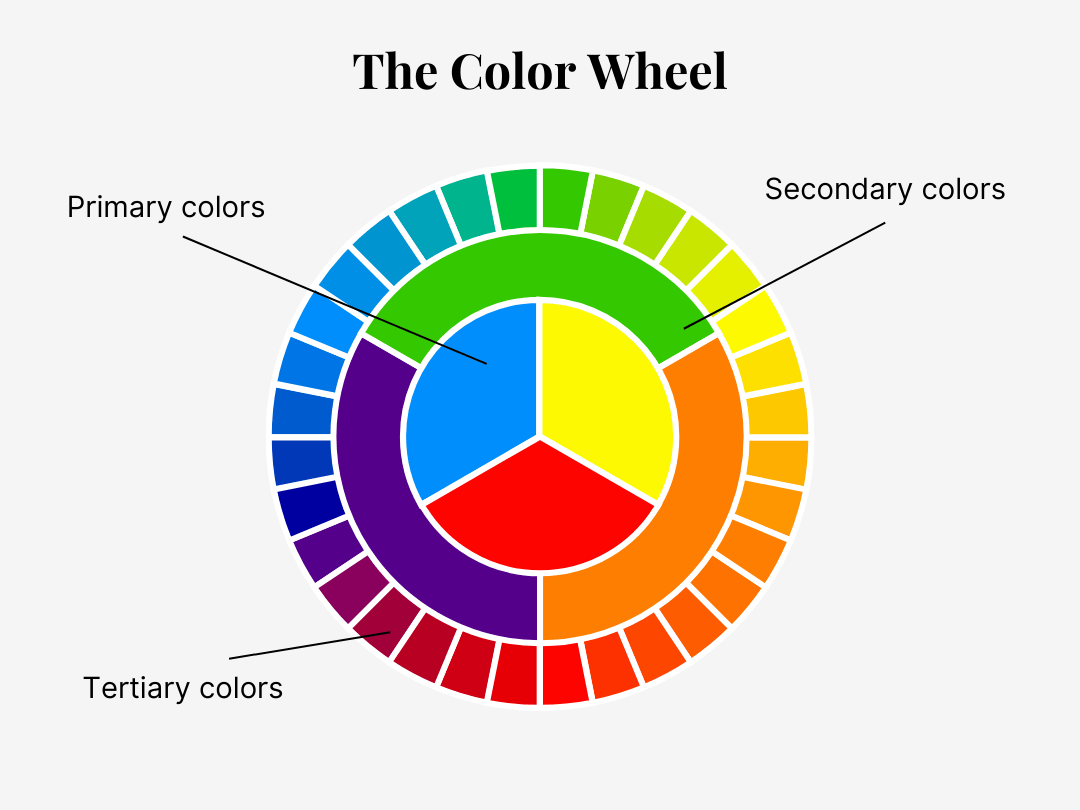
Color Wheel Basics for Interior Design
Okay, let’s get a bit technical – but I promise to make it fun! The color wheel is like your GPS for creating amazing color schemes. I remember being totally intimidated by it when I first started, but now it’s my best friend in design.
Primary Colors
Primary colors are like the building blocks of everything else – red, blue, and yellow. Think of them as the three musketeers of the color world!
Secondary colors
Secondary colors (green, purple, and orange) happen when two primary colors get together and decide to create something new.
Tertiary Colors
Here’s where things get really interesting! Tertiary colors are like the cool cousins of primary and secondary colors – they’re what you get when a primary and secondary color meet up. You know that gorgeous blue-green you see in tropical waters? That’s a tertiary color! I once designed an entire sunroom around a blue-green palette, and it felt like being on vacation all year round.
Think of colors like yellow-green, red-orange, and blue-violet. These in-between shades add sophistication to your color schemes. Tertiary colors can be a secret weapon for creating unique spaces that don’t feel like they came straight from a catalog!
Understanding Undertones
Oh boy, undertones – they’re like the sneaky ninjas of the color world! Here’s something that took me a while to figure out: every color has an undertone, and ignoring it can sabotage your whole design.
Here’s my quick guide to spotting undertones:
- Beiges can have pink, yellow, or green undertones
- Grays might lean blue, green, or purple
- Whites can be warm or cool
- Even black can have blue or brown undertones
Pro tip: If you’re struggling to see undertones, put your paint sample against a pure white paper – the undertone will usually reveal itself!
Temperature in Color
Let’s talk about warm and cool colors – but not in the way your art teacher explained it! In interior design, temperature is super important for creating the right mood. Warm colors advance (they make walls feel closer), while cool colors recede (they make spaces feel bigger).
I once used this trick to fix a loooong, narrow hallway. We painted the end wall in a warm terracotta that visually brought the wall closer, making the hallway feel more proportional. My client called it “design magic,” but it’s really just color psychology at work!
The Importance of Value
Value is like the volume control of your color – it’s how light or dark it is. This is crucial for creating depth in your design. Think about it like a mountain view: you’ve got dark colors in the foreground, medium values in the middle, and lighter values in the distance.
Here’s a trick I use all the time: in any room, try to include:
- Light values (like the foam on your latte)
- Mid-tones (like your favorite pair of blue jeans)
- Dark values (like that espresso you needed this morning!)
Playing with Saturation
Saturation is where the fun really begins! It’s how pure or muted a color is. I like to think of it as the difference between grape juice (saturated) and a glass of wine (less saturated). Both are gorgeous, but they create totally different vibes!
One of my biggest design breakthroughs was understanding that you don’t need super saturated colors to make an impact. In fact, slightly muted colors are often more sophisticated. I recently designed a living room using desaturated versions of the client’s favorite colors, and it turned out so much more elegant than if we’d gone with the pure, bright versions.
Creating Balance with the Color Wheel
Here’s where we put it all together! The color wheel isn’t just a pretty circle – it’s like your GPS for creating perfect color combinations. When I’m stuck on a design, I literally pull out my color wheel (yes, I carry one in my bag, and no, my friends never stop teasing me about it!).
Some of my favorite ways to use the color wheel:
- Complementary colors (opposite each other) for high drama
- Analogous colors (next to each other) for serene harmony
- Split-complementary for sophistication with a twist
- Triadic for balanced energy
Let me share a quick story about complementary colors. I once had a client who was absolutely in love with orange (not my personal favorite, I’ll admit). Instead of trying to talk her out of it, we used the color wheel to find its complement – blue. We ended up with this gorgeous combination of soft orange walls with navy blue accents. It was stunning, and it taught me to never underestimate the power of the color wheel!
Real-World Application
Now, you might be thinking, “This is all great in theory, but how do I actually use it?” Here’s my practical approach:
- Start with your non-negotiables (like that couch you can’t replace yet)
- Find its place on the color wheel
- Choose your color scheme type (complementary, analogous, etc.)
- Test, test, test!
Remember what I said about undertones? This is where they become super important. All your colors should have similar undertones to create that professional, pulled-together look.
Creating Effective Color Schemes
This is where the magic happens! After plenty of experimenting (and some interesting results), I’ve found these color schemes to be foolproof:
Monochromatic Schemes
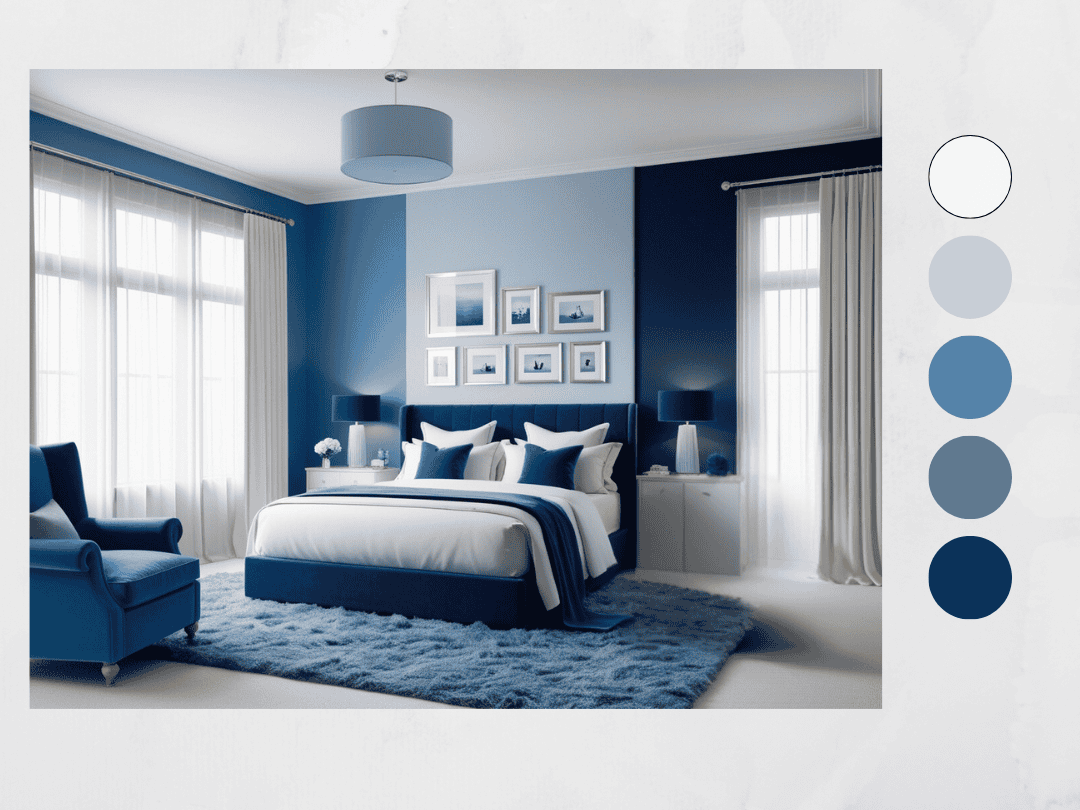
These are like the comfort food of color schemes – simple but satisfying! I love using different shades of the same color to create depth without risk. Just last month, I designed a bedroom using various shades of blue, from navy to pale sky blue, and my client absolutely loved the serene feeling it created.
Complementary Colors
Complementary colors sit opposite each other on the color wheel, and they create this amazing visual vibration when used together. But here’s the trick I’ve learned: don’t use them in equal amounts. I usually go for an 80/20 split – 80% of your dominant color and 20% of its complement.
Pro tips for complementary schemes:
- Use the more muted color for larger areas
- Add plenty of neutral space to let the eyes rest
- Consider using different shades and tints of each color
- Test how they look in different lights (I once had a purple/yellow combination that looked amazing during the day but kind of weird at night!)
Analogous Color Schemes
These are my go-to for clients who want a serene, pulled-together look. Analogous colors are like good neighbors – they sit next to each other on the color wheel and play really well together. Think of a sunset: yellow, orange, and red all blending beautifully.
I recently designed a bedroom using different shades of blue and green, and it felt like sleeping in a peaceful lagoon. The key was varying the intensity of each color. We used:
- A soft sage green for the walls
- Deep teal for the bedding
- Pale blue-green for the curtains
- Darker blue-green accents
Remember though – even with analogous schemes, you need some contrast! I always add a few neutral elements to prevent the space from feeling one-note.
Triadic Color Schemes
Okay, this is where it gets fun! Triadic schemes use three colors equally spaced around the color wheel. They’re bold and vibrant, but they can also be sophisticated if you know how to handle them. Think red, yellow, and blue – but maybe more like burgundy, mustard, and navy.
Here’s a little secret: I use triadic schemes a lot in kids’ rooms, but with a twist. Instead of pure colors, I use softer versions. For example, in a recent playroom, I used:
- Dusty rose instead of red
- Sage green instead of pure green
- Soft blue instead of bright blue
The result? A playful space that doesn’t look like a primary color explosion!
Split-Complementary Approaches
This is my favorite scheme for people who want something interesting but are scared of complementary colors (and trust me, some clients break out in a cold sweat at the mere mention of complementary colors!).
A split-complementary scheme uses one main color and the two colors adjacent to its complement. It’s like complementary colors with training wheels! I recently used this in a living room:
- Main color: Blue
- Split complements: Yellow-orange and Red-orange
- Result: Absolutely gorgeous without being overwhelming
The trick with split-complementary is to vary the intensity and amounts of each color. In that living room, we used:
- 60% soft blue for the walls
- 30% muted yellow-orange in the larger accessories
- 10% bright red-orange in small accents
Tetradic (Double Complementary) Schemes
This is the black belt of color schemes! It uses four colors arranged in two complementary pairs. Sounds scary, right? But when done right, it’s absolutely stunning. The key is to let one color dominate and use the others as accents.
I once designed a home office using a tetradic scheme:
- Deep navy (dominant color)
- Rust orange (complement to navy)
- Soft sage green (third color)
- Dusty rose (complement to sage)
The result was sophisticated and energizing without feeling chaotic. The secret? We used the navy as our main color, the sage as a secondary color, and just touches of the orange and rose in accessories.
The 60-30-10 Rule
I cannot mention this one enough – my foolproof formula for any color scheme!
- 60% dominant color (usually your walls)
- 30% secondary color (larger furnishings)
- 10% accent color (accessories and small details)
I actually have this rule tattooed on my… just kidding! But I do use it in almost every project. It’s like a recipe for perfectly balanced color schemes.
Remember: These aren’t rigid rules – they’re more like guidelines. I once broke all of these “rules” for a client who was an artist, and her space turned out amazing because it reflected her personality. The best color scheme is one that makes YOU happy when you walk into the room!
Common Color Psychology Mistakes to Avoid
Oh boy, have I made some doozies over the years! Let me save you from the same mistakes I made.
The biggest mistake? Going too bold too fast. I once painted an entire basement in bright purple because my client loved the color. Spoiler alert: they ended up repainting within a month! Now I always recommend testing colors in small areas first.
Not Considering Natural Light
This is probably the biggest mistake I see, and yes, I’ve made it myself! Remember that gorgeous gray living room I mentioned earlier that turned into a purple cave? That taught me a valuable lesson about light exposure.
Here’s what I’ve learned about natural light:
- North-facing rooms: Light appears cooler and bluer. Warm up these spaces with richer colors
- South-facing rooms: Get lots of warm light throughout the day. You can use cooler colors here
- East-facing rooms: Warm morning light, cooler in the afternoon
- West-facing rooms: Cooler morning light, dramatic warm light in the evening
Pro tip: Always test your paint colors on all walls of a room. I once had a client who tested only one wall and was shocked when the color looked completely different on the opposite wall!
The “Trendy Color” Trap
This is something that – especially through social media – gained a lot of popularity. Lots of people use certain colors in their homes because it currently is THE color of the moment. Within a year, they are considering repaints because it was just a trend and didn’t actually reflect their personality and personal taste. Here’s the truth: trendy colors are fun for accessories, but stick to more timeless choices for your bigger investments.
Instead of going all-in on trends, try:
- Using trendy colors in easily changeable items like pillows or art
- Incorporating small doses in accent pieces
- Testing if you actually like the color or just like it on Instagram
- Considering how the color makes you feel, not just how it looks
Ignoring Color Flow
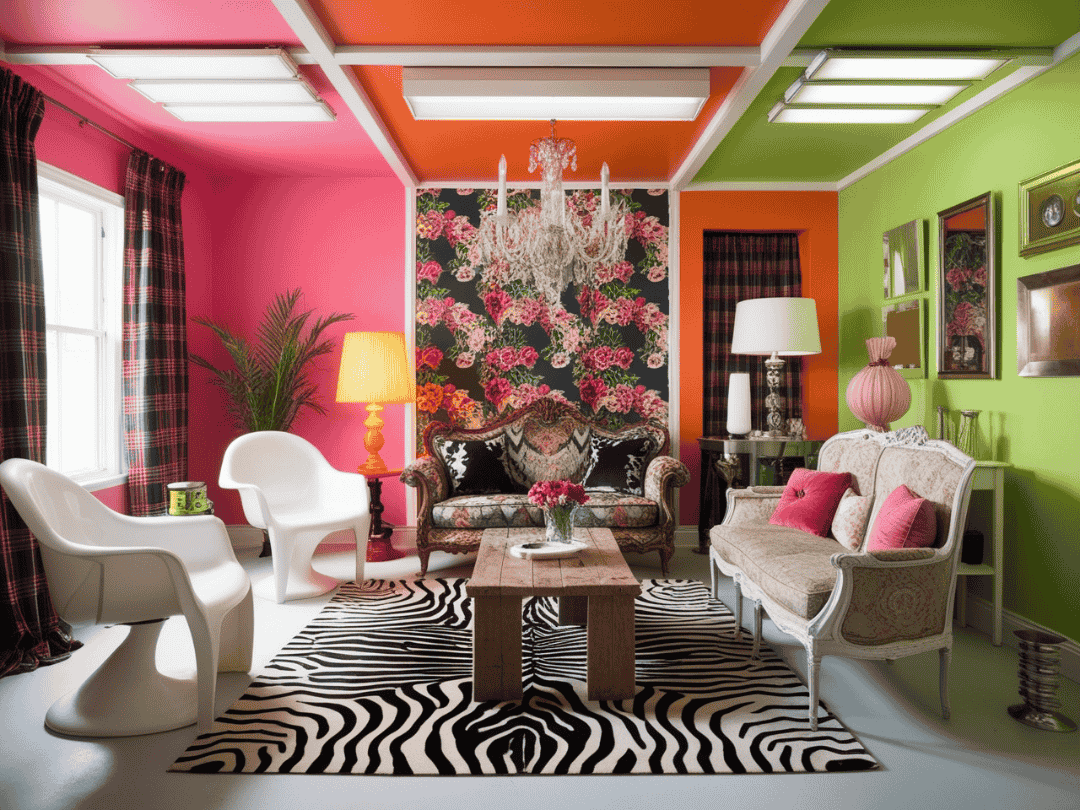
I call this the “rainbow house syndrome” – when every room is a completely different color with no cohesion. I made this mistake in my first home, and it felt like walking through a kaleidoscope! Each room looked great individually, but together? Total chaos.
How to create good color flow:
- Choose a common undertone for your main colors
- Use different intensities of the same color family
- Create a “color story” that runs through your home
- Consider sight lines from one room to another
The “More is More” Mistake
My mother loved color so much that she wanted every shade in every room. It was like a rainbow exploded in her house! While I admire the enthusiasm, too many colors can be overwhelming and actually negate the psychological benefits of each individual color.
My solution:
- Stick to 3-4 main colors per room
- Use the 60-30-10 rule
- Include plenty of neutral space
- Add variety through textures instead of more colors
Forgetting About Lighting Changes
This one’s sneaky! Your perfect color during the day might look completely different under artificial light. I once considered a beautiful soft green for a bedroom that turned into a sickly gray color at night – not exactly conducive to relaxation!
How to avoid lighting mishaps:
- Test colors under both natural and artificial light
- Consider the type of bulbs you’re using (LED, incandescent, etc.)
- Look at the color during different times of day
- Account for seasonal light changes
The “Same Color Everywhere” Syndrome
I had a client who was so in love with a particular shade of beige that she wanted to use it everywhere – walls, trim, ceiling, everything! While monochromatic can be beautiful, using the exact same color everywhere can make a space feel flat and lifeless. It’s that typical millennial Instagram influencer home. They look awesome in pictures but kind of soulless in real life (no offense).
Better approaches:
- Vary the intensity of your chosen color
- Use different finishes to create interest
- Add depth with varying shades and tones
- Include contrasting elements for visual interest
Misunderstanding Undertones
This is the sneakiest mistake of all! I once specified a “warm gray” for a client’s living room, but under their lighting, the green undertones came screaming out. Now I have what I call my “undertone detection routine”:
- Compare colors side by side with pure white
- Look at them in different lights
- Group samples by undertone family
- Test, test, and test again!
The Scale Mistake
This is about using the wrong intensity of color for the size of your space. For example whenI you use a dark, saturated blue in a small powder room, it might look nice on a pinterest picture, but can feel like being underwater (and not in a good way!).
How to handle color intensity:
- Larger spaces can handle deeper colors
- Small spaces often do better with lighter tones
- Consider ceiling height when choosing intensity
- Remember that color intensifies over large areas
Not Testing Properly
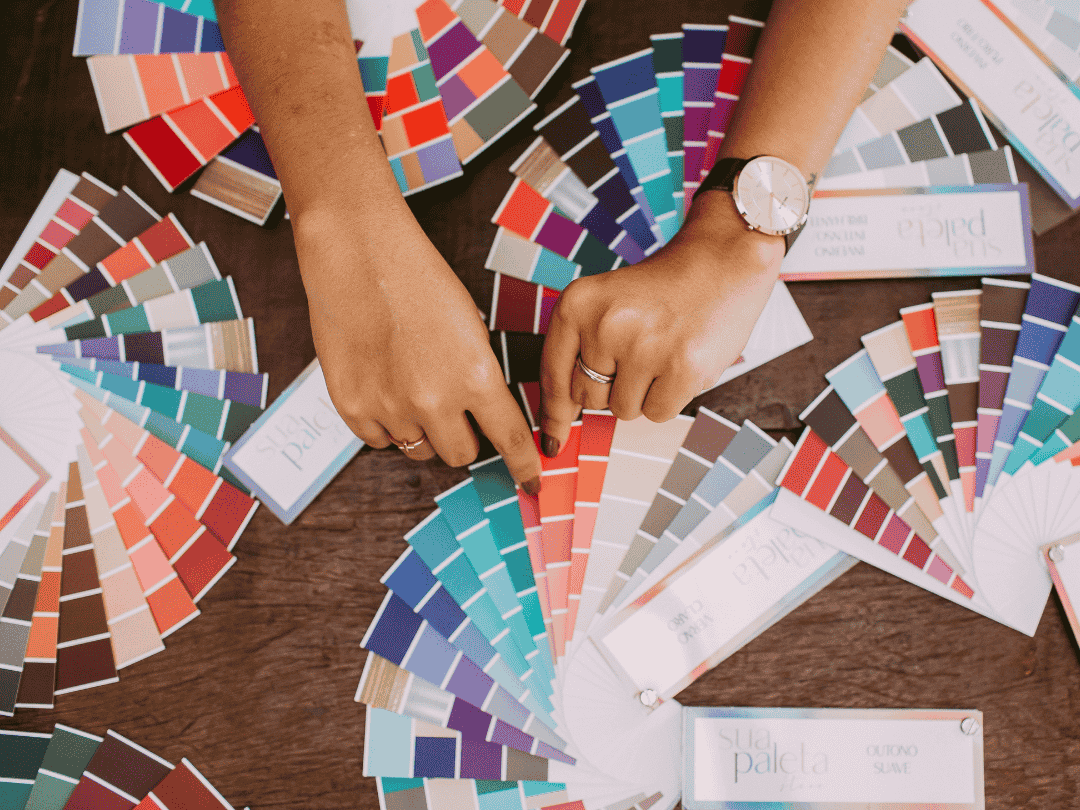
The “tiny paint swatch” syndrome – we’ve all been there! Trying to choose a color from those little paint chips is like trying to choose a wedding dress from a thumbnail photo. I’ve learned to always:
- Use large sample boards (at least 2′ x 2′)
- Move them around the room
- Look at them during different times of day
- View them against existing furnishings
Practical Application Tips
Here are my tried-and-true tips for using color psychology in your home:
- Always, always, ALWAYS test your colors! I can’t stress this enough. Those little paint samples might seem like a hassle, but they’re your best friends.
- Consider the lighting in your space. I once chose a “perfect” gray that looked like mud in the actual room because I forgot about the warm lighting!
- Think about color flow between rooms. Your home shouldn’t feel like a patchwork quilt unless that’s specifically what you’re going for!
Starting Your Color Journey
Let me share something I wish someone had told me when I first started: don’t begin with paint colors! I know it sounds counterintuitive, but here’s my tried-and-true approach:
- Start with your non-negotiables (like that gorgeous rug you inherited from Grandma)
- Find inspiration pieces (artwork, fabrics, or even a beautiful photo)
- Create a basic color palette
- THEN look for paint colors
A friend of mine once painted her entire living room before choosing furniture. Let’s just say we had to do a lot of repainting when her dream sofa didn’t match the walls!
The Four-Step Testing Process
I’ve developed what I call the “Foolproof Four-Step Testing Process”:
Step 1: Poster Board Method
- Paint large (minimum 2′ x 2′) pieces of poster board
- Leave a white border to prevent contrast confusion
- Move them around the room throughout the day
- Look at them under different lighting conditions
Step 2: The Squint Test
This might sound silly, but it works! Stand back and squint at your color samples. When you squint, you’ll see:
- The true intensity of the color
- How different colors relate to each other
- If there’s enough contrast in your scheme
Step 3: The Photo Test
Take photos of your samples because cameras often reveal undertones that your eyes miss. I discovered this accidentally when a client sent me photos of some sample boards, and I could immediately see the pink undertone that was giving us trouble!
Step 4: The Week-Long Trial
Live with your samples for at least a week. I know it sounds like overkill, but trust me – I’ve had clients fall in love with a color on Monday and hate it by Friday.
Working with Existing Elements
Here’s a reality check: unless you’re starting from scratch, you’ll need to work with existing elements. I’ve developed what I call the “Layer Method”:
Step 1: Identify Fixed Elements
- Flooring
- Cabinetry
- Stone or tile
- Architectural features
Step 2: Find the Common Thread Look for:
- Undertones that appear in multiple elements
- Temperature (warm or cool)
- Intensity levels
Step 3: Create Your Palette
Build your color scheme around these existing elements. I once turned a “boring” beige carpet into an asset by using it as the foundation for a gorgeous earth-toned color scheme!
The Light Factor Formula
Here’s my simple formula for adjusting colors based on light exposure:
- North-facing rooms: Go one shade warmer than your desired color
- South-facing rooms: Choose your true desired color
- East-facing rooms: Warm colors for evening use, cool colors for morning use
- West-facing rooms: Cool colors for morning use, warm colors for evening use
Working with Open Floor Plans
Open floor plans require special consideration. Here’s my “Connection Method”:
Step 1: Choose a Main Color
- Use it in different intensities throughout the space
- Keep undertones consistent
- Create flow between areas
Step 2: Use Transition Points
- Architectural features
- Furniture arrangements
- Area rugs
- Lighting zones
Step 3: Create Color Zones
I recently designed an open-concept space where we used:
- Living area: Main color at 100% intensity
- Dining area: Same color at 75% intensity
- Kitchen: Complementary color that shared the same undertone
The Sampling Strategy
Here’s my no-fail sampling strategy that’s saved countless rooms:
First Round
- Test 3-5 different colors
- Look at them in daylight and artificial light
- Take photos at different times
Second Round
- Narrow down to 2-3 options
- Test larger samples
- View them against fabrics and furniture
Final Selection
- Paint a 4′ x 4′ sample on the wall
- Live with it for at least 48 hours
- Check it during different weather conditions
The Finish Factor
Don’t forget about paint finishes! They can make or break your color choice. Here’s my room-by-room guide:
Living Rooms:
- Walls: Eggshell (forgiving and subtle)
- Trim: Semi-gloss
- Ceiling: Flat
Kitchens and Bathrooms:
- Walls: Satin (more washable)
- Trim: Semi-gloss
- Ceiling: Moisture-resistant flat
Bedrooms:
- Walls: Matte or eggshell
- Trim: Satin
- Ceiling: Flat
The Three-Height Rule
For balanced color application, always consider three heights in a room:
- Floor level (rugs, furniture bases)
- Eye level (walls, artwork, window treatments)
- Ceiling level (lighting, ceiling color, crown molding)
Curated Wall Art for Elegant Homes
Bring softness, texture, and intention into your home with digital wall art inspired by wabi-sabi, abstract forms, and muted watercolors. Every piece is crafted to create stillness and beauty—whether you’re styling a gallery wall or a minimalist nook.
Conclusion
Whew! We’ve covered a lot of ground, haven’t we? Remember, color psychology in interior design isn’t about following rigid rules – it’s about creating spaces that make you feel good. Trust me, I’ve seen how the right colors can transform not just a room, but the way people feel in their homes.
Start small, experiment, and most importantly, have fun with it! Maybe begin with a single room or even just an accent wall. Pay attention to how different colors make you feel, and don’t be afraid to adjust things if they’re not working.
I’d love to hear about your color adventures! What colors have you used in your home, and how do they make you feel? Drop a comment below and share your experiences – we’re all in this colorful journey together!
Remember, Rome wasn’t painted in a day (see what I did there?), so take your time finding the perfect colors for your space. Happy decorating!
When planning your space, remember that color choices affect both aesthetics and wellbeing. The best bedroom colors for sleep might differ from other rooms, but maintaining color flow between rooms ensures harmony throughout your home. From implementing color psychology interior design principles to understanding how different hues impact our daily lives, thoughtful color selection remains crucial for creating spaces that truly work.